How to Protect Your Car’s Paint from Tree Sap, Pollen, and Bird Droppings with a DIY Coating
You can protect your car’s paint from tree sap, pollen, and bird droppings by applying a DIY ceramic coating, a task that takes about two hours and costs a fraction of professional detailing. This transparent layer bonds chemically to your paint, creating a hydrophobic shield that repels organic contaminants before they etch into the clear coat.
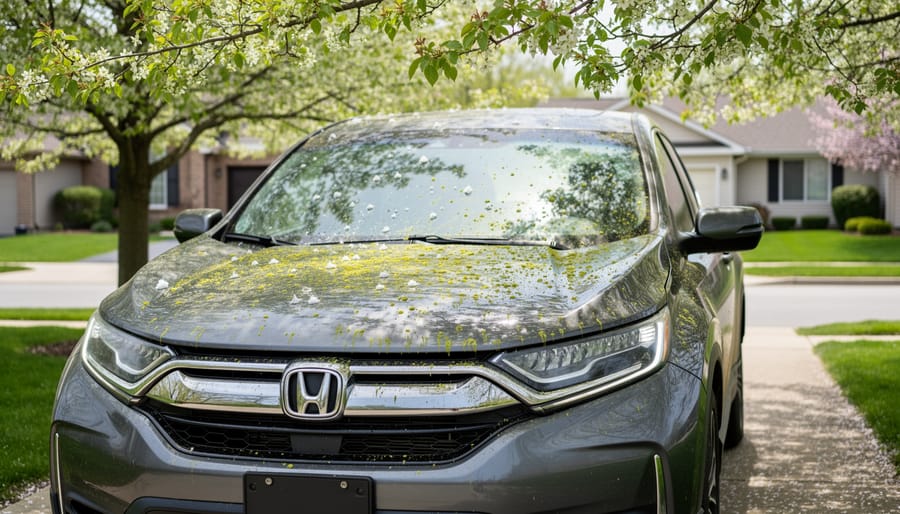
If you park under trees regularly (and let’s face it, shaded street parking is gold in the city), you’ve probably noticed the sticky aftermath. Spring brings pollen showers that bake onto hoods in the sun. Summer delivers sap that hardens like glue. Birds, well, they contribute year-round. Left for just a few days, these substances don’t just sit on the surface. They’re acidic, and they begin breaking down your paint’s protective clear coat, leaving dull spots or permanent stains that no amount of washing can fix.
The good news? You don’t need a professional’s equipment or expertise. A ceramic coating kit gives you everything required to create that barrier at home. The process involves thorough paint preparation, careful application of the coating solution, and a short curing period. Once cured, water beads off like it’s been oiled, carrying contaminants with it instead of letting them bond to the paint.
This guide walks you through the complete process, from gathering materials to verifying your coating has cured properly, with special attention to the small details that make the difference between a professional-looking result and a streaky disappointment. You’ll learn exactly how to use your ceramic coating kit effectively for lasting protection.
Why Spring Tree Debris Damages Your Car’s Paint
Your cherished urban garden might be flourishing under spring sunshine, but that same combination of warmth and greenery creates a perfect storm for automotive paint damage. Tree sap, pollen, and bird droppings aren’t just unsightly, they’re chemically aggressive substances that actively etch into your car’s clear coat when left untreated.
Tree sap contains acidic compounds and sugars that bond to paint surfaces. When UV rays heat the sap, it softens and penetrates deeper into the clear coat, creating permanent discoloration and rough texture. Flowering trees and fruit tree debris pose particular risks during their productive seasons, dropping sticky resin that bakes onto horizontal surfaces like hoods and roofs.
Pollen behaves differently but causes similar damage. These microscopic particles carry oils and proteins that, when combined with morning dew or rain, create a mildly acidic paste. This paste sits on your paint, and as it dries repeatedly through spring’s temperature swings, it etches microscopic pits into the clear coat. The result looks like dull, hazy patches that won’t wash away.
Bird droppings contain uric acid with a pH as low as 3.5, highly corrosive to automotive finishes. The damage accelerates under sunlight: heat causes the clear coat to expand, allowing the acid to penetrate deeper before the paint contracts again when it cools. This creates permanent ghosting or discoloration even after you’ve cleaned the surface.
Urban gardeners face compounded exposure because the same conditions that prevent plant health issues and spotting on leaves namely consistent sun and flowering vegetation, also maximize the volume and potency of paint contaminants landing on nearby vehicles. Your proximity to thriving trees means your car becomes a daily target.
What You’ll Need: Tools and Materials for DIY Coating
Before you head to the auto parts store or browse online, gathering the right supplies makes this project straightforward instead of frustrating. You don’t need professional-grade equipment, but having everything on hand before you start prevents those mid-project trips when you’re already wearing gloves.
Here’s what you’ll need, organized by the two main phases of the process:
- Washing phase: car wash soap (pH-neutral formula), two buckets with grit guards, wash mitt or sponge, hose with spray nozzle
- Decontamination: clay bar kit (includes lubricant) or synthetic clay mitt, additional microfiber towels for drying
- Surface prep: isopropyl alcohol (70% or higher) or dedicated panel prep solution, clean microfiber towels
- Coating application: DIY ceramic or polymer coating product (look for “consumer-grade” or “easy application” on the label), foam or suede applicator pads (usually 2-4 pads), 6-8 high-quality microfiber towels for buffing
- Safety gear: nitrile gloves, safety glasses, old clothes you don’t mind getting product on
- Optional but helpful: painter’s tape for masking trim, headlamp, or work light if your garage is dim
When shopping for the coating itself, you’ll see options ranging from $20 to $80 for a DIY-sized bottle. Polymer sealants tend to sit at the lower end and are incredibly forgiving for first-timers, lasting 6-9 months. Ceramic coatings cost more but can protect for up to a year or slightly longer. Both work well against sap, pollen, and droppings. Read the product description for “beginner-friendly” or “extended working time”, this means you won’t panic trying to buff it off before it hardens.
Skip anything marketed as “professional-only” or requiring special curing lamps. Those formulas cure too quickly and demand experience you’re still building. The consumer versions give you room to learn while still delivering solid protection for your spring parking challenges.
Safety Precautions and Weather Considerations
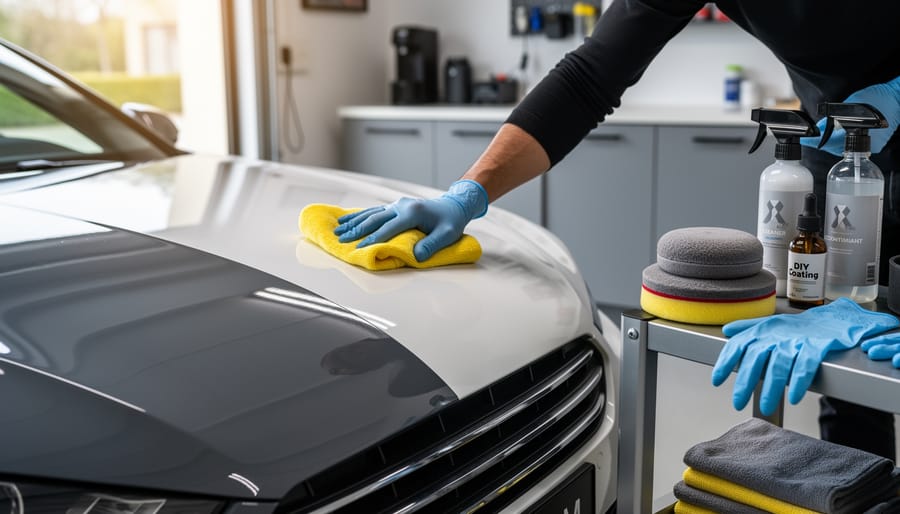
DIY coating products contain chemical solvents and hardeners that demand respect. Before you open any bottle, put on nitrile gloves, these coatings bond to skin as readily as they bond to paint, and removal is painful. Safety glasses protect your eyes from splashes, especially when you’re leaning over horizontal surfaces where product can drip. Work outdoors or in a well-ventilated garage with doors open and a fan running; the fumes from some formulas cause headaches and dizziness in enclosed spaces.
Weather shapes success as much as technique does. The ideal window is a dry, overcast day with mild temperatures, giving you a shaded workspace and stable humidity. Direct sun heats panels too quickly, causing the coating to flash before you can buff it, which leaves permanent streaks. Cold slows the chemical cure to a crawl, while extreme heat accelerates it unpredictably. Check the forecast for at least 48 hours ahead, you need no precipitation during application and curing, typically a full day. If your driveway lacks shade, wait for early morning or late afternoon when the car is naturally shaded. Wind kicks up dust that embeds in wet coating, so pick a calm day. These aren’t perfectionist details; they’re the difference between a slick, protective finish and a blotchy mess you’ll need to polish off and redo.
Step-by-Step: Applying Your DIY Paint Protection Coating
Preparing the Surface
Start with a complete wash using a pH-neutral car soap and the two-bucket method, one bucket for clean, soapy water and one for rinsing your mitt. This prevents dragging dirt across the paint and creating scratches. Work from top to bottom, rinsing each section thoroughly before moving on. Pay extra attention to areas where sap and pollen collect: around mirrors, door handles, and along the hood edge. Rinse the entire car with clean water and dry it completely with a clean microfiber towel.
Now comes the crucial decontamination step. Even after washing, your paint likely has bonded contaminants you can’t see but can feel. Grab your clay bar kit and follow the instructions to knead the clay into a flat disc. Spray a generous amount of clay lubricant on a small section, about two square feet, of your paint. Gently glide the clay bar across the surface using light pressure and straight, overlapping passes. You’ll feel it grab at first as it picks up embedded particles, then it’ll glide smoothly when that section is clean.
Fold and reshape the clay frequently to expose a clean surface. If you drop it, throw it away and use a fresh piece. Work systematically around the entire car, one panel at a time. This process removes the tree resin, pollen residue, and mineral deposits that washing alone can’t touch.
After claying, give the car another quick rinse and dry it thoroughly. Run your hand over the paint, it should feel glass-smooth, not gritty or rough. Any remaining texture means you’ve missed spots that need more clay work. The coating will only bond properly to perfectly clean paint, so this step determines your entire project’s success.
Applying the Coating
Now comes the moment you’ve been carefully preparing for, actually applying the coating to your car’s paint. This step requires focus and rhythm, but it’s entirely manageable when you break it down panel by panel.
Start with a small, flat section like the hood or roof. Shake your coating bottle according to the product instructions, then apply 3-5 drops onto your applicator pad. That’s usually enough for a 2-foot by 2-foot area. Resist the urge to use more, excess product creates streaks and makes buffing harder.
Work the coating onto the paint using overlapping straight lines in one direction, then immediately cross back perpendicular to create an even cross-hatch pattern. Apply light, consistent pressure. You’re not scrubbing; you’re laying down a uniform layer. The coating should spread smoothly without dragging.
Here’s the critical timing: most DIY coatings need buffing within 30 to 60 seconds of application, once they start to “flash” or look slightly hazy. Don’t let it sit longer or it becomes difficult to remove. Use a fresh microfiber towel folded into quarters, and buff in straight motions until the surface looks clear and glossy. Flip to a clean section of towel frequently.
Move methodically around the car, complete one panel, then the next. Door panels, fenders, bumpers, roof, hood, trunk. If you’re coating the entire vehicle, expect to spend 45 minutes to an hour on application alone. Take your time. Rushing creates uneven coverage and frustration.
Stay aware of your surroundings. If wind picks up or temperatures drop significantly, pause and reassess your conditions.
Curing and Final Steps
After you’ve applied and buffed the coating, the real work happens chemically, and patience is your best ally. Most DIY ceramic and polymer coatings need at least 24 hours to cure before your car sees any moisture. During this critical first day, keep the vehicle in a covered, dry location. Garage parking is ideal, but a carport or even a well-ventilated storage space works if rain isn’t forecasted.
What must you avoid? Water is the main enemy during curing. Don’t wash the car, drive through rain, or let morning dew settle on the surface. Also skip touching the paint, oils from your fingers can interfere with bonding. If you applied the coating outdoors and weather turns unpredictable, a car cover designed for fresh coatings (breathable fabric, not plastic) can provide emergency protection.
While the coating feels dry after 24 hours, it hasn’t reached maximum hardness yet. Full curing typically takes seven days. During this week, you can drive normally and park under your usual tree, but postpone any washing or waxing. Light dust and pollen won’t harm the developing bond, though you’ll want to gently blow or brush them off rather than wipe.
After the full cure period, your coating has cross-linked into a durable shield. That’s when you’ll see its true performance, water sheeting off in satisfying beads, and sap wiping away without leaving a ghost of a stain.
How to Verify Your Coating Is Working
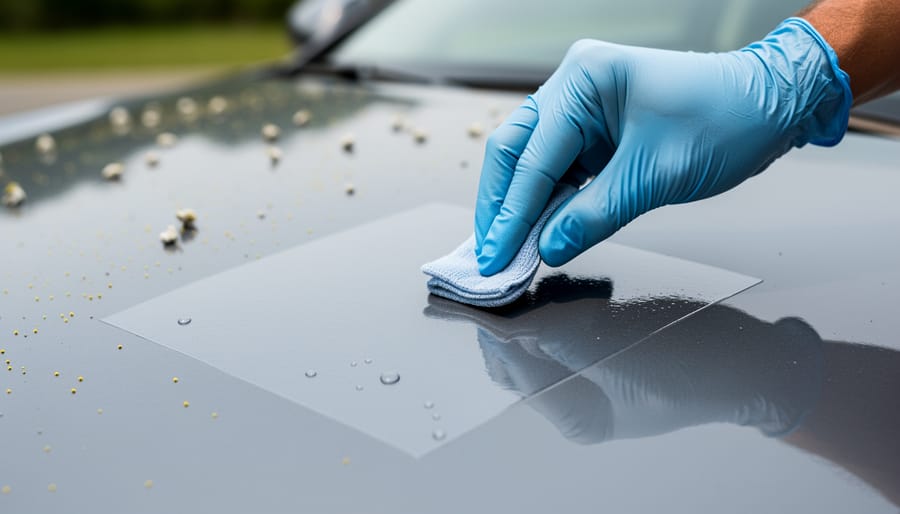
Once your coating has cured for at least 24 hours, it’s time to run some simple tests to make sure you’ve achieved good coverage. These checks take just a few minutes and will give you confidence that your paint is protected.
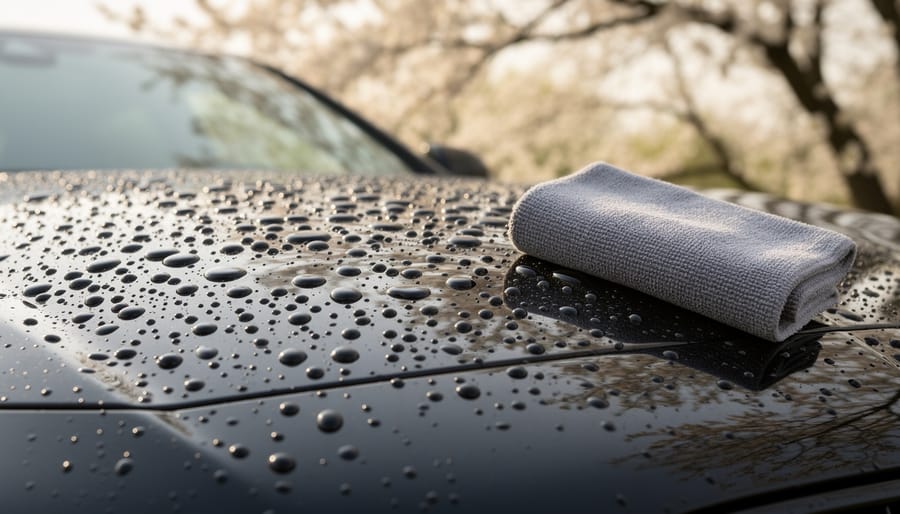
Start with the water beading test. Spray a section of your car with clean water or wait for a light rain. A properly applied coating will cause water to bead up into tight, round droplets that roll off easily. If water sheets across the surface or forms flat puddles instead, that area may need a second coat. The beading should be noticeably tighter and more pronounced than on uncoated paint.
Next, run your clean hand across the paint. It should feel incredibly smooth, almost slippery, with no rough patches or bumps. Any texture you feel likely means contamination wasn’t fully removed before coating, or the coating itself has trapped something.
Finally, inspect the paint under bright light at different angles. Look for streaking, rainbow hazing, or shiny high spots where too much product sat too long. Mild hazing often buffs out with a clean microfiber towel. Stubborn streaks or thick spots require removing that section with isopropyl alcohol and reapplying. Don’t worry if you find a small imperfection, most first-timers do. Just address it before the coating fully hardens over the next week.
Maintaining Your DIY Coating Through Spring and Beyond
Your coating’s first real test arrives with the next pollen dump or overnight bird visit. Washing becomes your maintenance routine, but technique matters: use a pH-neutral car soap (never dish detergent, which strips protection) and the two-bucket method to minimize scratching. During peak spring debris season, typically March through May in most regions, plan to wash every two weeks, or weekly if your car sits under heavy bloom. Skip automated car washes entirely; their harsh brushes and alkaline soaps degrade DIY coatings faster than any organic contaminant could.
When fresh sap or droppings land on your protected paint, remove them within 48 hours if possible. Spray the spot with waterless wash or quick detailer, let it sit for 30 seconds to soften the debris, then gently wipe with a clean microfiber towel. The coating’s slick surface makes this easier than on bare paint, but dried sap still requires patience. For stubborn residue, use isopropyl alcohol on a microfiber cloth, it won’t harm the coating but dissolves organic acids effectively.
- Do hand-wash with pH-neutral soap and soft microfiber wash mitts
- Do rinse thoroughly before washing to remove loose particles
- Don’t use automatic car washes or abrasive brushes
- Don’t apply wax or additional sealants over the coating
- Don’t let bird droppings sit longer than two days
Most DIY polymer coatings last six to twelve months under normal conditions, but heavy spring exposure shortens that window. When water stops beading tightly or the surface feels less slick, it’s time to reapply. Consider this maintenance cycle part of your outdoor space planning protecting your car complements maintaining your garden. If repeated coating feels tedious, your next project might be to choose lower-sap plants for areas near your parking spot, creating a cleaner overhead canopy while keeping the shade you need.
You’ve just armed yourself with a practical, affordable way to protect your car’s paint while enjoying the shade and beauty of parking under trees. No need to sacrifice convenience or spend hundreds on professional detailing, this DIY coating puts you in control of keeping your vehicle looking great through spring’s toughest challenges.
The best part? You’re not just protecting your paint; you’re gaining peace of mind. Those mornings when you find pollen dust or sticky sap on your hood won’t send you into a panic anymore. A quick rinse, and you’re good to go.
We’d love to hear how your coating project turns out! Share your experience in the comments below: Did the water beading test blow your mind? Which spring tree challenge hits your neighborhood hardest, heavy pollen, persistent sap, or relentless bird droppings? Your insights help fellow urban gardeners navigate their own tree-and-car balancing acts.
Remember, this coating typically lasts six to twelve months with proper care, giving you protection through multiple seasons. You’ve invested a few hours and modest funds to save your paint from hundreds or thousands in potential damage. That’s a win worth celebrating.
Frequently Asked Questions
Living under a leafy canopy brings its own set of practical questions, especially when you’re investing time in protecting your car. Let’s address the most common concerns urban gardeners have when considering a DIY coating for spring challenges.
How much does a DIY coating cost compared to professional ceramic coating?
A quality DIY coating kit typically runs $30-75 and covers one to two vehicles, while professional ceramic coating costs $500-2,000 depending on your location and the installer’s reputation. You’re trading time and learning for substantial savings.
How long will my DIY coating actually last?
Most consumer-grade coatings provide 6-12 months of protection with proper maintenance, though some claim up to 2 years. Professional-grade products offer 2-5 years, but they also require more skill to apply correctly.
Is applying the coating really difficult for a first-timer?
Not if you follow the instructions and work slowly. The hardest part is patience, rushing the prep work or applying too much product causes most beginner problems, not the actual coating process itself.
What should I do if bird droppings or sap land on my fresh coating?
Remove them as soon as possible using a damp microfiber cloth and gentle pressure, the coating makes this easier than on bare paint. For stubborn sap, use a dedicated sap remover or isopropyl alcohol, which won’t harm a cured coating.
Many readers also wonder whether older paint or certain colors need special consideration. The good news is that DIY coatings work on any factory paint color and age, though older, oxidized paint benefits dramatically from a polish before application. Darker colors like black and navy show imperfections more readily, so take extra care during your surface prep on these shades. If your clear coat is heavily damaged or peeling, address those repairs first, coating over compromised paint just seals in the problem.
Another frequent question concerns compatibility with existing waxes or sealants. You must remove all previous protection products before applying your coating, which is why the clay bar step matters so much. Wax residue prevents proper bonding and causes the coating to fail prematurely, wasting your effort and materials.
Finally, folks often ask whether they can apply coating in sections over multiple days if time is limited. While possible, this approach risks visible lines where cured and fresh coating meet. If you truly can’t complete the whole car in one session, work in logical divisions, front half one day, rear half the next, rather than random panels. The coating creates a chemical bond that works best when applied consistently across connected surfaces.