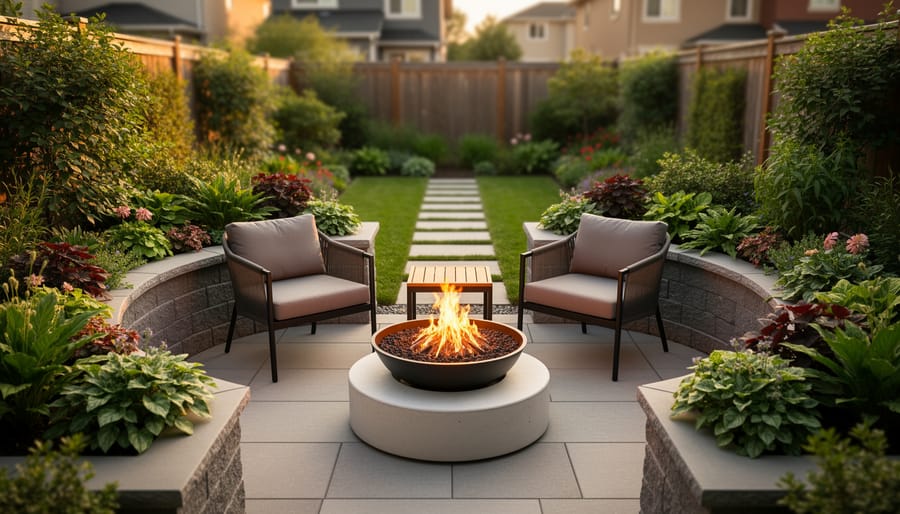
How to Redesign Your Small Yard to Make Room for an Outdoor Fireplace
Transforming a small urban yard to include a fireplace takes careful planning and methodical space reconfiguration, but you can achieve a working fire feature in a weekend with the right approach and a modest budget of $500 to $2,000. The process involves auditing your existing layout, clearing and leveling a safe zone, installing a heat-resistant base, and arranging flexible seating and planting zones that preserve garden functionality while meeting local fire codes.
If you’re reading this, you probably love the idea of evening gatherings around a crackling fire but worry your 10-by-15-foot patio garden can’t handle both flames and flowers. Good news: it can. Small yards force creative decisions, and that constraint often produces the most rewarding outdoor spaces. You’ll need to think vertically, choose dual-purpose elements, and respect clearance distances, but the payoff is a cozy, multi-season retreat that feels twice its actual size.
This guide walks you through the complete yard transformation process, from measuring setbacks to verifying smoke flow and drainage. We’ll cover the tools you need, the safety checks you can’t skip, and the exact sequence of steps that turns a cramped patch of grass into a functional fire-and-garden hybrid. Whether you’re installing a compact chiminea, a modern propane bowl, or a small built-in pit, the site prep and layout principles remain the same. Let’s get started.
Assessing Your Yard: Space Planning Fundamentals
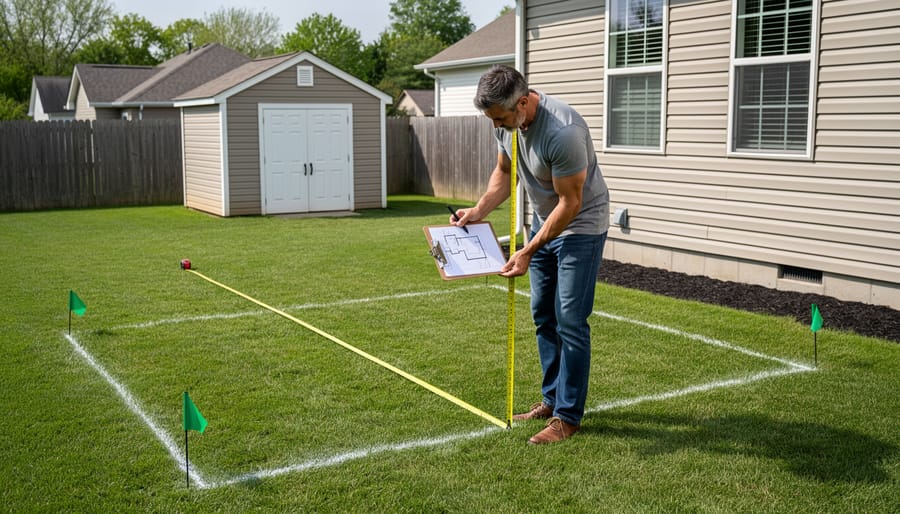
Start with what you have right now. Grab a measuring tape and spend 30 minutes this weekend actually walking your yard with a notebook. Measure the total dimensions, then note where you’ve got wasted space, that corner where nothing grows, the path you never use, the dead zone behind the shed.
Your first task is identifying what you can realistically fit. Most compact fireplaces or fire pits need a footprint of about 4-6 feet in diameter, but the safety zone around them matters more than the feature itself. You’ll need clear space extending outward from the flames, which brings us to the non-negotiable part.
Once you know your clearance requirements, sketch a bird’s-eye view of your yard on graph paper, nothing fancy, just rectangles for your house, fence lines, and existing features like sheds or large trees. Mark the areas that meet clearance requirements. You might discover your yard has more options than you thought, especially if you’re willing to learn more about corner installations or repositioning elements.
Look for underutilized zones. That strip along the fence where you pile garden debris? Potential fireplace zone. The center of the lawn that’s just empty grass? Could work if you’re willing to shift your seating arrangement. The key is seeing your yard as flexible space rather than fixed zones. Walk through it at different times of day to notice sun patterns and how you actually move through the area, your ideal fireplace spot should feel natural to gather around, not shoehorned into an awkward corner you’ll never use.
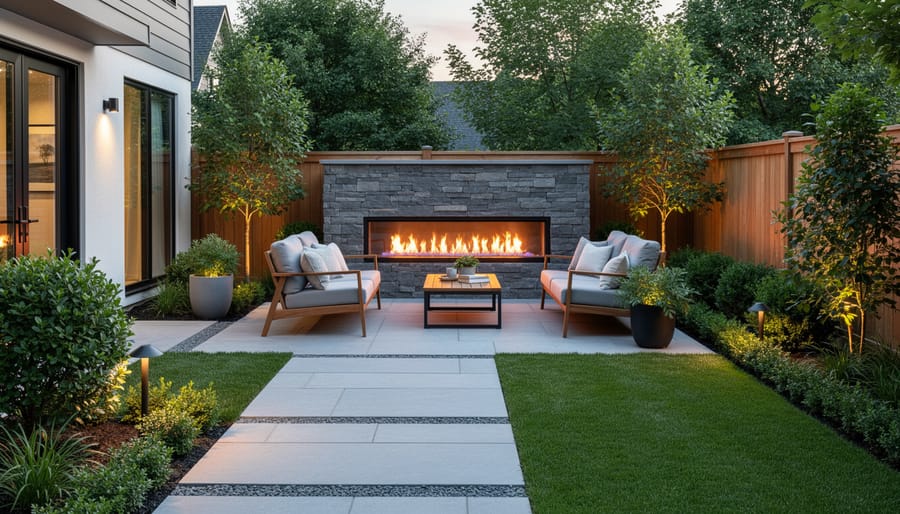
What You’ll Need: Tools, Materials, and Permits
Before you start moving anything around, gather your supplies so you’re not halfway through digging only to realize you need a level. Most of these items are inexpensive and reusable for future garden projects, making this a worthwhile investment in your outdoor space.
- Measuring tape (25-foot minimum for yard dimensions)
- Marking paint or wooden stakes with string for layout planning
- Shovel and rake for ground prep and leveling
- Hand tamper or plate compactor for base compaction
- Level (4-foot carpenter’s level works well for fireplace pads)
- Wheelbarrow for moving materials
- Gravel (¾-inch crushed stone for drainage base)
- Sand (coarse builder’s sand for leveling pavers)
- Pavers, flagstone, or concrete mix for your fireplace pad
- Landscape fabric to prevent weed growth under the base
You can tackle the yard clearing, measuring, and basic ground prep yourself with confidence. Installing pavers on a level base is also manageable for most DIYers willing to take their time. However, call in professionals for gas line installation, permanent masonry structures, or electrical work for lighting around your fireplace. These tasks require licensed contractors in most municipalities and aren’t worth the safety risk of attempting yourself.
Permit requirements vary wildly by location. Portable fire pits under 3 feet in diameter rarely need permits, but permanent installations almost always do in urban areas. Check with your city’s building department before you buy materials, some neighborhoods have specific restrictions on open flames or require inspections. Your local fire marshal’s office can clarify setback requirements from property lines and structures, which typically range from 10 to 25 feet depending on your fireplace type.
Safety First: What to Know Before You Begin
Before you pick up a single tool, understand the risks. Fire features in small yards carry real hazards if you skip the fundamentals, and crowded urban spaces leave little margin for error.
Start by confirming what lies beneath your yard. You must call 811 before digging to mark underground gas lines, electrical cables, water pipes, and fiber optics, hitting any of these during excavation can cause explosions, service outages, or expensive repairs. Wait for the utility markers to arrive before you dig, even if you’re only going a few inches deep.
Measure your clearances carefully. Most fire codes require 10 to 20 feet between a fireplace and any structure, your house, fence, shed, or overhanging trees. In tight urban yards, this often dictates where your fireplace can go. Check your city’s specific requirements, because violations can mean fines or forced removal.
Consider wind patterns. Observe which direction smoke blows on typical evenings in your yard, and avoid placing the fireplace where prevailing winds push smoke directly at your house, windows, or your neighbor’s outdoor spaces. Nobody wants a backyard campfire that turns their deck into a smokestack.
Talk to your neighbors before you build, especially in dense areas where yards are close. A heads-up about your plans prevents conflicts and helps you address concerns about smoke, light, or noise before they become disputes.
Step-by-Step: Transforming Your Yard Layout
Step 1: Choose Your Fireplace Location
Start by standing in your yard at different times of day to observe sun patterns and wind direction. The best fireplace location typically faces away from prevailing winds, otherwise you’ll spend your evenings dodging smoke. Watch where shadows fall in the evening when you’ll actually use it; a spot that gets afternoon sun will be more inviting than one already in shade by dinner time.
Check clearances next. You need 10 feet minimum from your house, fence, or any structure, and 20 feet is safer for larger fire features. Measure these distances with tape, not guesswork, insurance claims get denied over missed clearances.
Corners are your friend in small yards. A fireplace tucked into a back corner creates a destination point while leaving the center open for movement. You’ll naturally define zones this way: fire area versus circulation paths.
Walk your typical traffic patterns. If the fireplace blocks your route from the back door to the shed, you’ve chosen poorly. The location should feel like a natural gathering spot, not an obstacle course. Sketch it out, mark the footprint with garden stakes and string, then live with that layout for a few days before committing.
Step 2: Declutter and Remove Obstacles
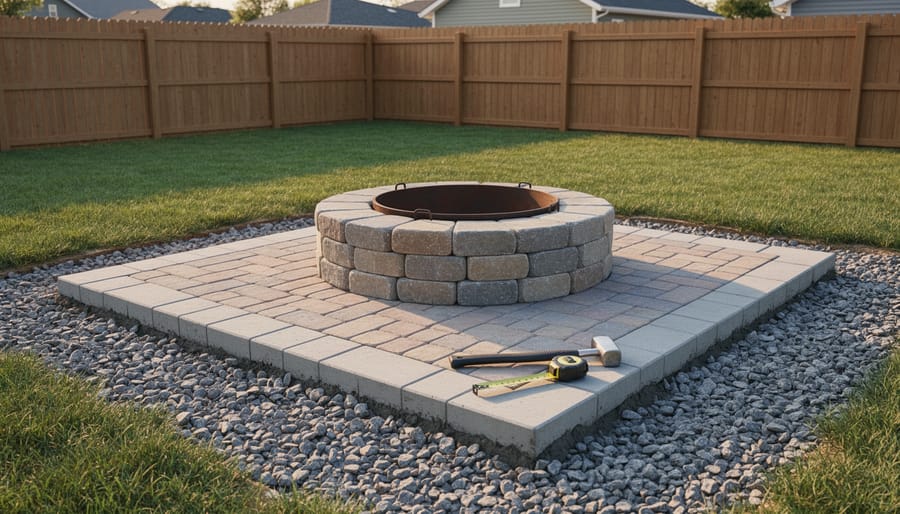
Once you’ve chosen your fireplace location, it’s time to clear space ruthlessly. Walk through your yard with a critical eye and ask: does this item earn its footprint?
Start with the obvious culprits. Oversized planters that hold struggling plants? Move them or downsize. That second seating area you never use? Time to let it go. Garden beds producing more weeds than vegetables? Either revitalize them or reclaim the space.
Create three zones: keep, relocate, and remove. “Keep” items stay where they are and serve essential functions. “Relocate” pieces move to spots that won’t interfere with your fireplace clearances, perhaps against a fence or wall. “Remove” means donate, sell, or discard.
Be honest about yard clutter masquerading as “potential projects.” Those stacked pots, the broken trellis you’ll fix someday, decorative items collecting grime, they’re squatting on valuable real estate.
Your goal is liberating floor space while preserving what you genuinely use and love. Think vertical when possible: can that garden tool collection hang on a wall instead of sprawling across a corner? Every square foot matters in a small yard.
Step 3: Consolidate Your Garden Beds
The scattered garden beds taking up floor space in your small yard can work vertically instead. Start by identifying beds that occupy prime real-estate, those square planting areas in the middle of your yard are the biggest space hogs. Relocate these plants to your yard’s perimeter, creating a border garden against fences or walls that frees up the central area for your fireplace zone.
Tiered planters are your best friend here. Stack two or three levels of planting containers in corners or along fence lines to maintain the same amount of greenery in a fraction of the footprint. Wall-mounted containers and vertical pocket planters can hold herbs, flowers, and even small vegetables without touching the ground at all.
Think strategically about plant height. Tall, narrow plants like bamboo, ornamental grasses, or columnar evergreens create visual impact and privacy without spreading horizontally. Place them at the yard’s edges to frame your space rather than bisect it.
Don’t feel guilty about eliminating underperforming beds, that struggling patch of lawn or the flowers you never quite maintain can go. Consolidating into well-tended vertical gardens often means healthier plants overall because you’re concentrating your care efforts where they count.
Step 4: Create Multi-Purpose Zones
The secret to squeezing a fireplace into a tight yard is making every square foot work overtime. Your fireplace zone shouldn’t just be for fires, it needs to earn its footprint.
Start by choosing seating that doubles as storage. Weatherproof deck boxes with cushions on top hold firewood, garden tools, or outdoor dining supplies while providing perches around the fire. Position these boxes in an L-shape or semi-circle to create flexible seating that you can rearrange for different group sizes.
Consider installing a fold-down table on a nearby fence or wall. These drop-leaf designs stay flat against the structure when not needed, then flip down for dining or as a potting bench during garden work. You can pivot from morning coffee to evening s’mores without dedicating permanent space to a table.
If your fireplace plan includes a raised bed or retaining wall, cap it with smooth stone or thick wood planks at seat height (16-18 inches). This built-in perimeter seating costs nothing extra and defines your fire zone without eating up floor space. Just ensure the wall sits far enough from the flames, at least three feet for comfort and safety.
Step 5: Prepare the Fireplace Base
Your fireplace foundation determines whether you’ll have a safe, stable setup or a wobbly disaster that settles unevenly over time. Start by excavating the chosen area to a depth of 4-6 inches, creating a level base that extends at least 12 inches beyond your fireplace footprint on all sides.
Check for level constantly with a 4-foot level as you work. Even small slopes can cause pavers to shift or water to pool against your fireplace. If your yard has natural drainage issues, dig slightly deeper on the low side and add extra gravel to compensate.
Lay landscape fabric to prevent weed growth, then add 3-4 inches of compacted gravel. This creates essential drainage so water never sits under your fire feature. Use a hand tamper or plate compactor to firm each inch of gravel before adding the next layer. Loose gravel compresses over time, causing your entire installation to sink.
For the surface layer, you have two solid options. Pavers over a 1-inch sand bed work well for fire pits and chimineas, letting you adjust individual stones if needed. A poured concrete pad provides maximum stability for heavy masonry fireplaces but requires waiting several days for curing before installation.
Test the finished base by walking across it. Any wobble or give means you need more compaction.
Step 6: Install Your Fireplace
With your base prepared, installation depends on your chosen fireplace type. Portable fire pits and chimineas simply rest on your prepared surface, center them carefully and test stability before use. For permanent installations, follow manufacturer specifications exactly, ensuring proper anchoring and ventilation.
Call professionals for gas line connections, electrical work, or complex masonry projects. Licensed contractors ensure code compliance and safety, critical for permanent structures. They’ll handle gas permits, pressure testing, and proper venting that DIY methods can’t safely replicate.
Even for portable units, double-check clearances one final time. Your fireplace should sit level, stable, and ready for years of cozy evenings without wobbling or settling unevenly into your prepared base.
Space-Saving Design Strategies That Work
Urban gardens in Brooklyn, San Francisco, and London prove you can have a beautiful fireplace in a yard that’s barely 12 feet wide. The secret isn’t sacrificing your garden, it’s using outdoor space planning tricks that make every square foot work twice as hard.
Corner installations are your best friend in tight spaces. Positioning your fireplace in the back corner creates a natural focal point while leaving the center of your yard open for movement. This diagonal sight line makes the yard feel longer than it actually is. One Chicago gardener transformed a 10×15 foot space by tucking a chiminea into the corner and angling two small benches to face it, creating an intimate conversation area that doesn’t block garden access.
Here are techniques that consistently deliver results in compact yards:
- Build benches with flip-top seats for storing firewood, cushions, or garden tools underneath
- Install wall-mounted planters or trellis systems to grow vertically instead of spreading across valuable floor space
- Use retaining walls as dual-purpose seating ledges around your fire feature
- Mount weatherproof mirrors on fences to visually double your space and reflect firelight at night
- Choose stackable or folding furniture that you can tuck away when hosting larger groups
Vertical gardening around your fireplace works beautifully. Climbing jasmine or clematis on a trellis behind your fire pit adds greenery without eating floor space. Container gardens on tiered plant stands bring life to corners while staying flexible, you can shift them when you light the fire. A Seattle couple planted a living wall of succulents beside their fire feature, creating a stunning backdrop that’s completely fire-safe and requires minimal depth.
Keeping Your Garden: Plants That Work Near Fire Features
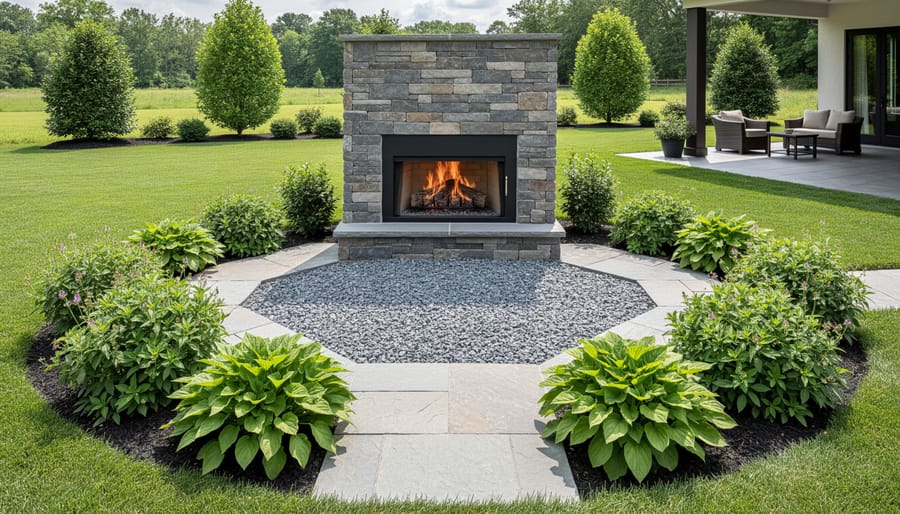
You don’t have to strip your yard bare to add a fireplace. Fire-resistant plants let you keep the greenery while maintaining safety around your fire feature.
The key is choosing plants that won’t easily ignite and positioning them thoughtfully. Succulents are your best friends here, their high water content makes them naturally fire-resistant, and varieties like hens-and-chicks, sedums, and aloe thrive in the well-drained soil around fireplace areas. Lavender creates a fragrant border while resisting flames, and its low-growing habit won’t block sightlines. Rock roses and ice plants work beautifully as ground covers within 3-5 feet of the fire zone.
Keep highly flammable plants, ornamental grasses, junipers, pine shrubs, anything with dry, resinous foliage, at least 10 feet from where you’ll be burning. During fire season in dry climates, increase this distance to 15 feet.
Container gardening gives you the ultimate flexibility. Plant herbs like rosemary and thyme in large pots that you can move away from the fireplace when it’s in use, then roll back into view when the fire’s out. Use wheeled plant caddies for heavier containers. This approach lets you preserve your garden’s character while keeping safety front and center, and you can rearrange your green space to suit each season’s needs.
How to Know Your Redesign Is Working
Before you commit to permanent changes, run a practical test of your new layout. Set up temporary furniture in the fireplace zone, folding chairs, a movable fire pit, even cardboard boxes as stand-ins, and spend an evening using the space as you normally would. Walk through typical tasks: Can you reach your best plants for containers to water them? Is there a clear path from your back door to the seating area? When seated, do guests feel cramped or can they move comfortably?
Check your safety clearances with a measuring tape, not just eyeballing. Confirm 10 feet minimum from structures, overhanging branches trimmed back, and no stored firewood or cushions within the heat zone. Light a small test fire and observe smoke patterns: does it blow toward windows or seating? Finally, verify you haven’t lost garden functionality that matters to you. If you used to grow tomatoes and now have nowhere for them, or your morning coffee spot disappeared, the layout needs adjustment before you pour concrete or install permanent pavers.
Common Questions About Small-Yard Fireplaces
What’s the minimum yard size for a fireplace?
You can fit a fire feature in a yard as small as 100-150 square feet if you choose a compact chiminea or small fire pit and plan the layout carefully. The key isn’t total square footage, it’s ensuring you meet safety clearances (typically 10 feet from structures) and leave room for at least two people to sit comfortably.
Can renters install a fireplace in their yard?
Renters should stick with portable, non-permanent options like standalone fire pits or chimineas that don’t require installation or modification of the property. Always get landlord approval in writing before bringing any fire feature onto the property, and choose models you can take with you when you move.
How do I deal with smoke bothering neighbors?
Choose propane or natural gas fireplaces that produce minimal smoke, position your fire feature to take advantage of prevailing winds that carry smoke away from homes, and burn only dry, seasoned wood if using a wood-burning option. Letting neighbors know before your first fire and keeping gatherings reasonable in duration goes a long way toward maintaining good relationships.
What do I do with my fireplace during off-season?
Portable fire pits and chimineas should be cleaned, covered with weatherproof tarps, and stored in a shed or garage when not in use. If you don’t have storage space, invest in a quality cover and winterize your yard by removing ash, checking for rust, and ensuring proper drainage around permanent installations so you can continue to garden in winter without the fireplace becoming an obstacle.
These questions reflect what urban gardeners wrestle with most when they’re excited about adding a fire feature but worried about practical constraints. The good news: nearly every concern has a workable solution, and the smallest adjustments, choosing the right fuel type, communicating with neighbors, picking a portable model, make all the difference between a fireplace that causes headaches and one that becomes your favorite yard feature.
Transforming a small yard to fit a fireplace is absolutely achievable when you approach it strategically. Start with that simple assessment, measure your space, identify what you rarely use, and sketch out possibilities. You’ll be surprised how much room opens up when you consolidate and reimagine your layout.
Your compact outdoor space can become the cozy gathering spot you’ve envisioned. The key is planning thoughtfully, prioritizing safety, and being willing to let go of elements that aren’t serving you well.
We’d love to hear about your small-yard fireplace journey! What creative solutions have you discovered? What challenges are you facing? Share your photos, questions, or tips in the comments below, your experience might be exactly what another urban gardener needs to hear.